
Okay! I've posted this before but its what I'm cooking today! I made it for my baby before he left for the Air Force. Today I'm making it for my other baby who needs to put a little weight on her thin little frame. Its a family favorite.
Soccer is almost over and basketball is . . . well we're not participating in basketball this year! Woohoo free time! . . . After I get this Teacher dinner thing over with on wednesday that is . . . but I got other people to cook it up for me 'cause I'm sneaky like that!
Here it is from way back in May . . .
I spent all weekend trying to feed my baby too much because he's deserting me for the USAF.
I also spent all weekend (18 hours) watching a photography webinar by Penny De Los Santos . . .
I got leg cramps! Who knew I couldn't sit still for that long? I had trained for it. I spend hours each day doing nothing after all!
Now I'm going to be burning food while I try to create light, color, shape, composition and tension in each photo! Oh and tell a food story too. . .

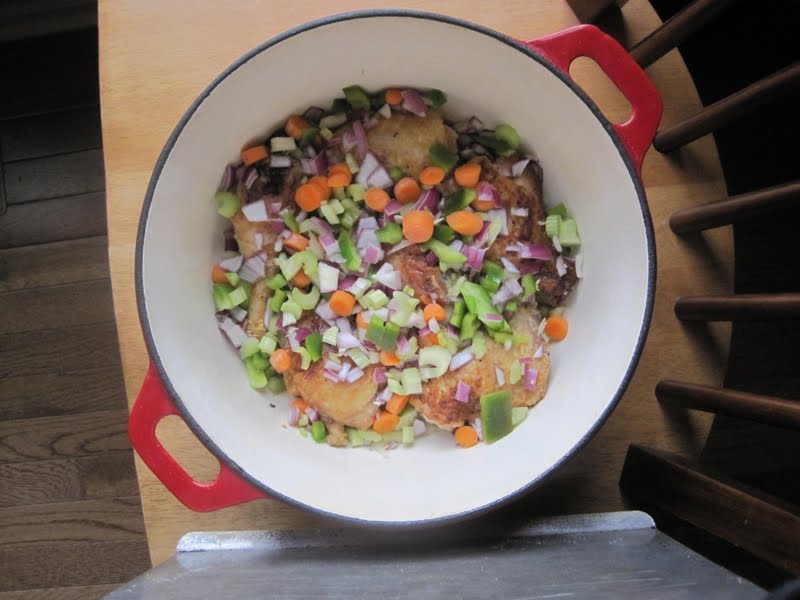
Do you think these vegetables are telling a story?

I think their story is "What is she going to use on us first? The knife in the corner of the recorder over there?" Bell pepper is always such an optimist!
These are the vegetables I put in my Gentle Giant's curry by the way!

I only chopped up half of it because it was so big! Green bell pepper is sort of bitter and curry powder is sort of bitter so let's not over do it.

Some sweet juicy carrot! Yes I use the little snack carrots. If they're willing to do some work for me I let them. They cook up just fine for this purpose. I suspect Penny De Los Santos would insist on carrots with tops and bits of dirt clinging to them . . .

Oh and the celery! The beautiful celery! I'll admit I ended up chopping it up just a little further. Ideally the vegetables become soft, tender, bits, that the children don't notice . . .

I had lots of red onion bits in the fridge so I grabbed them all. Peeled off the dry bits. Used the knife where necessary until I had just the fresh beautiful parts. By the end I had 1/2 to 3/4 of an onion.

It just wouldn't be the same if we didn't have lots of garlic and ginger!

Peel 'em up and give them a nice chop. They're basically minced. Everything is under 1/8th of an inch. You could make them smaller with a grater or put the garlic in a garlic press if that's easier for you. I just wanted them slightly course and rustic. Okay, I didn't want to go back to the kitchen and find the other tools . . . I was watching Penny make photos! Throw all the veggies in a bowl and toss them around a little. You're going to use them later.

Now for the chicken! Yes, I put my chicken in my sink. I do, really! I washed the sink with dish soap and water just like I would any pot or pan! It's a lot easier to manipulate in there. I like my meat in the sink because it's so easy to sanitize afterward. Besides we're going to cook the meat. Really . . . it'll be fine! Seriously, trust me! My mother said I could! She grew up with an actual icebox and diesel powered washing machines! On a farm! No food poisoning for three generations! Take deep breaths! It'll be fine.

Throw some salt and pepper on it! Chicken likes salt and pepper. It makes it feel, dressed! Now for a parting of the ways. If you don't like chicken skin or are short on time you CAN skip browning the chicken in oil before you stew it. I have done this recipe with . . . gasp . . . boneless skinless chicken breast. It just won't be as rich and tasty . . . it won't be . . . Andrew's Curried Chicken . . . My favorite choice would be bone in chicken thighs with no skin if you want to skip this.

Now with either chicken preference throw a little flour on the chicken . . .

. . . and mix it all together. The chicken will get a little pasty . . . now please note I just have to step over to the other side of the sink to wash my hands! See how I've limited the possibility for cross contamination? Huh? See!

Heat some oil in a skillet! Then go DOH! I should of used the beautiful enamelled dutch oven I'm going to use later!

It's making LOTS of noise because of the bits of water clinging to it! I'm just giving them a quick brown on pretty high heat. Turn it down if you see any mist rising cause that's not STEAM its SMOKE from the oil!

It's all bubbling away! Now since I have gas burners that wave in every passing breeze I find it nice to rotate my pan every minute or so. Just to even the browning out a little. If you've got an older electric stove with hot spots you can do the same. If you've got the heat up nice and high in two to four minutes you should start to see some browning.

Can you see where the color is starting to change on the edges? I'm going to go ahead and give it a look-see and see if it's brown.

Some are browner than others! Now if your chicken is stuck hard and fast to the pan try waiting a minute. If you put it in a hot pan with hot oil it'll flip as soon as it has formed a little crust. The meat will release when it's ready to be flipped.
Oh and look there's the pot I should of browned them in! The pot that would of helped me not get grease all over my counter . . . but it would of probably taken three batches!

Please, be smarter than me and remember to put a throw rug in front of the stove to catch your grease splatter before you start to slip, before the cat starts to lick the floor, before you turn to grab a rag and end up pirouetting like a ballerina! Oh and don't wear your favorite red blouse either!

Second batch! I've got to hurry. My webinar lunch break is almost over!

Take about half the chicken and put it in the bottom of an oven safe casserole or be like me and use a nice Dutch Oven type pot. Start to throw on some of the chopped veggies!
*if you decided to skip browning the chicken this is where you'd start to follow the recipe again. May I please, please beg you to use skinless chicken thighs with bones in them? Pretty please? You'll keep a lot of richness if you do! Okay . . . you CAN use the boneless, skinless, thighs . . .

Add about half of the vegetables to this first layer of chicken. Aren't they pretty?
Penny told me to seek the light! The only light at this point was in the office on a chair. I had to use a cookie sheet to reflect some too. Penny's VERY inventive. This is probably not the "sense of place" that she was talking about. Photo stories should give a "sense of place" you see.

Add the rest of the chicken and vegetables. Remember the chicken is still very raw at this point! Be safe!

Remember that pan you browned the chicken in? There's a lot of delicious goodness that in there. If I messed up my kitchen for it I'm using it!

So tip your pan over and wait a few seconds. We just want to get rid of the oil! Let the crusty goodness settle to the bottom. Then dump the oil.

Now please, please, wipe the grease off the outside of the pan before you put it back on a burner! It can ignite in quite a dramatic fashion! I try to only set things on fire when I'm pregnant . . .

Get yourself some spices. I always use curry powder and a cinnamon stick at the very least. Give you curry powder a little taste. I'm not particularly fond of the curry powder I have here so I'm jazzing it up with some cumin powder and a little garam masala. Add some red pepper if its not spicy enough for you!

Now turn the heat on to about medium. Curry spices really appreciate some toasting and it's a good way to integrate the lovely browned bits. Even if you're skipping the whole chicken browning thing I'd still heat up the spices in a pan a little!

Now . . . as far as I know . . . there's no wine in Indian cooking. But, heck, it's me! Let's add a little wine . . .

It'll form a nice paste when it cooks in . . .

Now get very angry and frustrated when you can't fine your regular can opener. You know the one that makes the little triangular holes in the top of a can? The one that makes pouring controlled and easy? The one that's missing because it's got a bottle opener on the other side? That one?

Pour it in however works for you!

When it's smooth take it off the heat! You might want to taste this and see what your salt level is like. This is our cooking liquid and it's only going to get blander. Add some salt if it's not VERY flavorful at this point.
*if you added flour it'll be slightly thickened

Pour it over everything! It'll only fill the pot halfway. The plan is that as it heats the chicken and vegetables will release their moisture and form a nice sauce! Just enough sauce to cover everything!

So put a lid on it! A nice tight lid! Now I stuck it in the oven at 300 deg F. for a couple of hours. It bubbled, it toiled, it troubled . . . okay it just bubbled. I toiled cleaning up grease splatters. I troubled myself over how it was doing and checked and poked it every 30-60 minutes or so. If the chicken isn't nestled in sauce after the first hour go ahead and add a little water.
Sorry for the complicated cooking terms again. Nestled means it's 1/2 to 3/4 covered. Otherwise it's be covered, submerged, swimming etc.

Oh be still my heart!

Now! The chicken is salty and spicy with all sorts of lovely aromatic spices! So I like some nice basmati rice. The texture of it is lovely against the silky, moist chicken. The peas are a lovely sweet counterpoint to the highly flavored foods. The naan well it . . .

Makes a lovely platform for the goodness to travel to your mouth! Excuse me . . . I need a moment . . .

. . . to see if there's any leftovers . . .
Andrew's Curried Chicken
serves 4
8 chicken thighs
1/4 cup all purpose flour
4 cups of diced, bell pepper, carrot, onion, and celery
1/4 cup minced ginger
1/4 cup minced garlic
1/4 cup curry powder
1 cinnamon stick
1/2 tsp ground cumin (optional)
1/2 tsp garam masala or Chinese 5-spice powder (optional)
1/4 cup dry white wine (optional)
1-14 oz can low sodium chicken broth
vegetable oil
salt and pepper
Mix all the vegetables together and set them aside. Season chicken with salt and pepper and sprinkle with flour. Chicken should be very lightly coated. Cover bottom of dutch oven or large skillet with oil (2-4 Tbsp) and heat over high heat. Brown chicken in two batches. A few minutes per side should make them nicely brown. Turn heat off. Set chicken aside. Drain grease from pan. Put pan back on medium heat and add the spices. Heat them until they're fragrant. Add wine and broth and scrape bottom of pan until it forms a light sauce. Reserve. Layer chicken and vegetables in pan and pour sauce over everything. Cover and bake at 300 deg F. Check after an hour to make sure a sauce is forming. I like to rearrange the chicken so it is all at least partially covered. Add water if necessary. Cook one more hour.
**Serve with a lovely ice cold IPA style beer! They don't call it India Pale Ale for nothing.


